Simplify Scheduling with FindTime in Outlook
- May 18, 2022
FindTime is a Microsoft Outlook add-in that’s very effective! Many of us struggle to manage our schedules and can spend a lot of time emailing back and forth to set a meeting time with colleagues or clients.
FindTime streamlines this process by aggregating the availability of your contacts, helping narrow down meeting time options quickly. It is available for Outlook on Mac, PC, and the web application. Here’s how to use it!
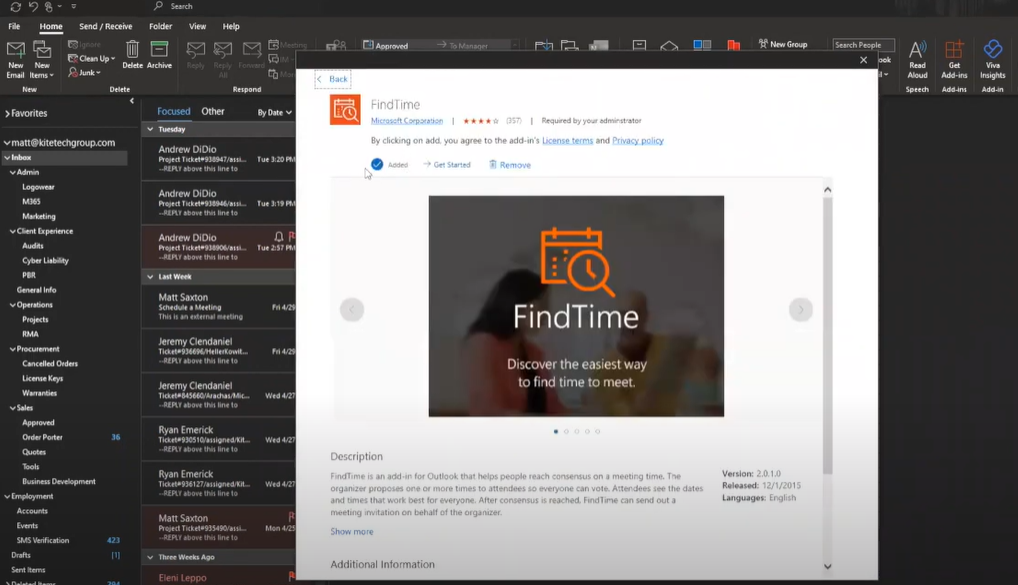
Step 1: Install FindTime
- Go to MS Outlook homepage.
- Click on “Get Add-ins” on the top right of the homepage.
- Search for “FindTime” and click “Add.”
- Once installed, you’ll see it on the top right of your screen near the “Get Add-ins” button.
Step 2: Use FindTime to Create a Meeting Time Options Poll
- Start by opening a new email or replying to a client or colleague who wants to set up a meeting.
- Add required attendees to your email in the “To” field. Additionally, you can add any optional attendees in the “CC” field.
- Once you have your attendees selected, click on the “FindTime” button.
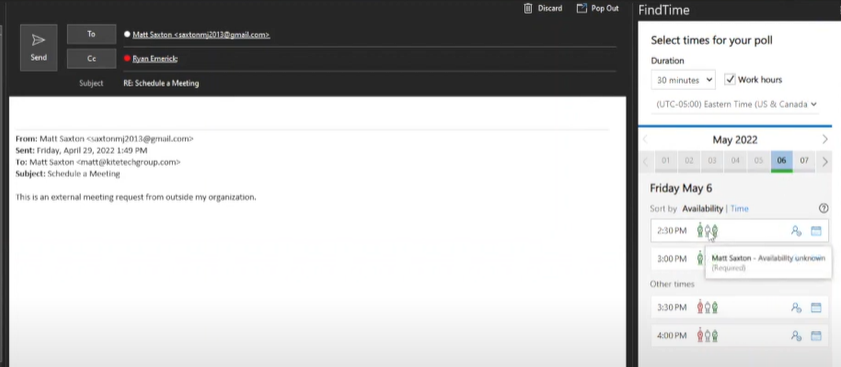
- The FindTime panel will open on the right hand of the screen, where you can see the availability of anyone whose calendar you have “view” access for.
- This panel will show the availability status of the contacts you added into your email. You will then be able to see the mutual free times that are available. These options go into a poll that is sent to the client(s), so they can select their preferred option.
Step 3: Customize Your Options
- In the FindTime panel, you can set options such as location, duration or meeting, and the times you’re available. You can also select an option to set up a Teams meeting.
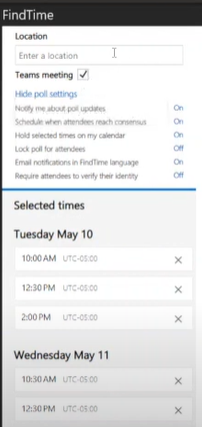
- When you have adjusted all your settings, click “next.” This will add the poll to your email so that the client can see all the available options to set up a meeting.
Step 4: Next Steps (From the Client)
- From the client’s perspective, they receive an email with a link with the poll to schedule a meeting. It looks something like this:
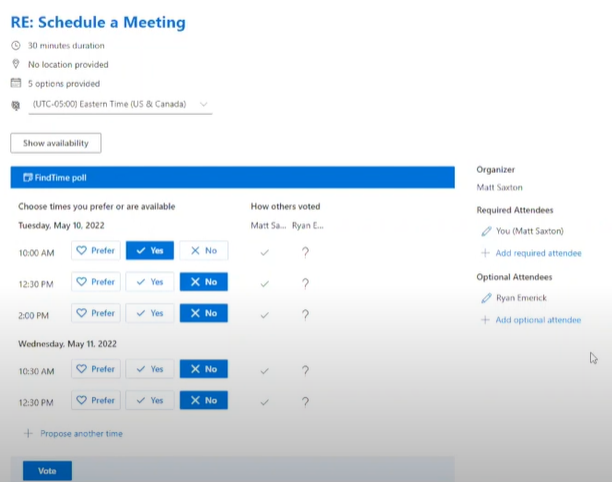
- The client can select their preferred meeting time, and then FindTime will go ahead and book a time that works for everyone else.
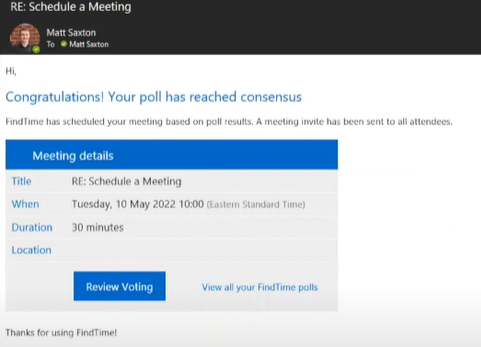
- Once that’s done, FindTime sends an email confirming the meeting details and adds it to the calendar of all the parties involved.
And that’s it! It’s as simple as gathering the availability from colleagues and sending a poll to your client. There are many benefits to FindTime:
- Clients can choose a time that works best for them without being limited to just a few options.
- Streamlines communications so there are less emails back and forth.
- Selects options that work for all the parties identified as needing to be part of the meeting.
- Integrates with your calendar and MS Teams functions.
FindTime is an underrated feature of Microsoft Outlook. Try it today to see just how helpful it is! And if you’d like to learn more technology tips and tricks or watch some of our other video tutorials, check out Kite Technology Group’s YouTube channel. Or, visit Kite Technology Group’s website to find out more about our Managed IT Services.

Matt Saxton
Client Experience Manager
Kite Technology Group
